shopify2.0 特定商品を商品一覧やコレクション一覧から非表示にする方法

Hammy'sではshopifyを使用してオンラインストアを運用しています。
ある理由から特定の商品を一般のお客様には見せたくない商品があり、今回紹介する方法を見つけましたので紹介します。
前回の記事で、メタフィールドを使用して「サイト内検索結果」や「Google検索」にヒットさせない方法を紹介しましたが、今回の方法と合わせて使うことで、より完璧に商品を目隠しすることができます。
注意点
テーマファイルを編集するので、必ずバックアップを作成してから作業してください。
特定の非表示にしたい理由
理由はシンプルなのですが、あるお客さまから問い合わせがあり、受注販売した商品がありました。そのお客様にshopifyで決済していただくために、その人にしか見えないページが必要でした。
つまり、商品ページは存在していますが、URLを知っている人しか気が付かない商品を作りたかったというわけです。
特定商品を商品一覧やコレクション一覧から非表示にする方法
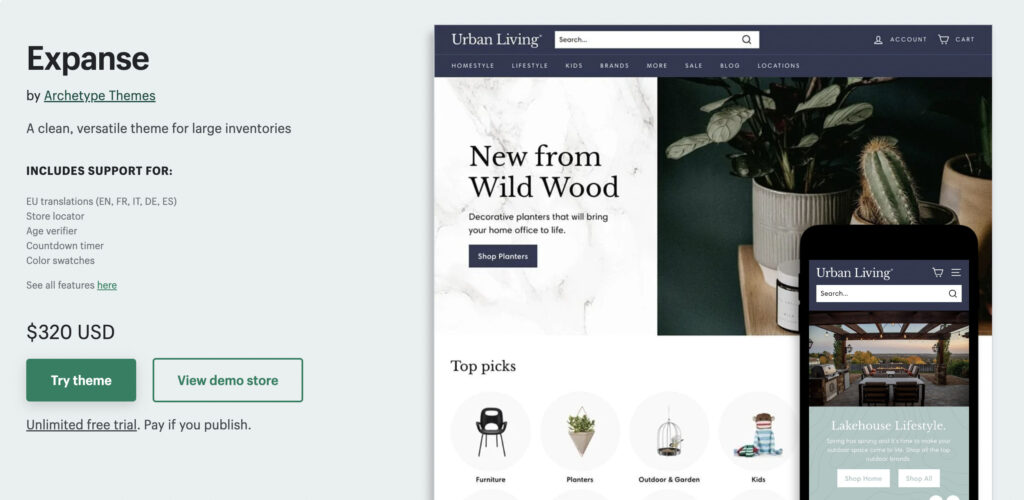
当ECサイトで使用しているshopifyテーマはExpenseという有料テーマをベースにカスタマイズしていますが、他テーマでも基本的には同じです。
非表示にしたい商品にタグを付与する
まずは非表示にしたい商品の編集ページから、商品にタグを付与させます。
僕は「非表示」という商品を付与させました。
コレクション一覧のループファイルを探す
自作テーマではなく、テンプレートを使用している、ビギナーにとってはこの作業が面倒なのですが、
- ダッシュボード
- オンラインストア
- テーマ
- コードを編集
からループさせているファイルを見つけ出します。
shopify2.0のデフォルトテーマの「Dawn」だと、「main-collection-product-grid.liquid」というファイルの中にループの記述があります。
ここでは例としてDawnで方法を紹介します。
shopifyテーマDawnのコレクションループしているファイル

セクションの中にある、「main-collection-product-grid.liquid」の100行目付近(バージョンによって記述が変わっているかもしれません)
<div class="collection{% if section.settings.filter_type != 'vertical' %} page-width{% endif %}">
            <div class="loading-overlay gradient"></div>
            <ul id="product-grid" data-id="{{ section.id }}" class="
              grid product-grid grid--{{ section.settings.columns_mobile }}-col-tablet-down
              grid--{{ section.settings.columns_desktop }}-col-desktop">
              {%- for product in collection.products -%} <!-- ここからループ -->
                {% assign lazy_load = false %}
                {%- if forloop.index > 2 -%}
                  {%- assign lazy_load = true -%}
                {%- endif -%}
                <li class="grid__item">
                  {% render 'card-product',
                    card_product: product,
                    media_aspect_ratio: section.settings.image_ratio,
                    show_secondary_image: section.settings.show_secondary_image,
                    show_vendor: section.settings.show_vendor,
                    show_rating: section.settings.show_rating,
                    lazy_load: lazy_load,
                    show_quick_add: section.settings.enable_quick_add,
                    section_id: section.id
                  %}
                </li>
              {%- endfor -%} <!-- ループ終わり -->
            </ul>
            {%- if paginate.pages > 1 -%}
              {% render 'pagination', paginate: paginate, anchor: '' %}
            {%- endif -%}
          </div>
        {%- endif -%}
      {%- endpaginate -%}
    </div>
  </div>
</div>
上の例だと、6行目からがループの内容となっています。
ここに簡単なコードを追加します。
<div class="collection{% if section.settings.filter_type != 'vertical' %} page-width{% endif %}">
            <div class="loading-overlay gradient"></div>
            <ul id="product-grid" data-id="{{ section.id }}" class="
              grid product-grid grid--{{ section.settings.columns_mobile }}-col-tablet-down
              grid--{{ section.settings.columns_desktop }}-col-desktop">
              {%- for product in collection.products -%} <!-- ここからループ -->
         {% unless product.tags contains '非表示' %} <!-- 追加 -->
                {% assign lazy_load = false %}
                {%- if forloop.index > 2 -%}
                  {%- assign lazy_load = true -%}
                {%- endif -%}
                <li class="grid__item">
                  {% render 'card-product',
                    card_product: product,
                    media_aspect_ratio: section.settings.image_ratio,
                    show_secondary_image: section.settings.show_secondary_image,
                    show_vendor: section.settings.show_vendor,
                    show_rating: section.settings.show_rating,
                    lazy_load: lazy_load,
                    show_quick_add: section.settings.enable_quick_add,
                    section_id: section.id
                  %}
                </li>
         {% endunless %} <!-- 追加 -->
              {%- endfor -%} <!-- ループ終わり -->
            </ul>
            {%- if paginate.pages > 1 -%}
              {% render 'pagination', paginate: paginate, anchor: '' %}
            {%- endif -%}
          </div>
        {%- endif -%}
      {%- endpaginate -%}
    </div>
  </div>
</div>
7行目と24行目にずつ1文追加しました。
- 7行目…{% unless product.tags contains '非表示' %}
- 24行目…{% endunless %}
これで保存すればOKです。
先ほどのタグを追加で「非表示」という名前のタグを追加したので、7行目には「非表示」と記述しています。
これで保存すれば非表示になっているはずです。
Expense4.1.0の場合

僕の使用しているテーマ、Expenceの場合は、スペニットの中の「product-grid-item.liquid」というファイルが対象です。(これ見つけるの大変だった)
{%- liquid
  assign on_sale = false
  if product.compare_at_price > product.price
    assign on_sale = true
  endif

  assign product_tags = product.tags | join: ','
  assign has_custom_label = false
  assign custom_labels = ''
  if product.metafields.theme.label and product.metafields.theme.label != blank
    assign has_custom_label = true
    assign custom_labels = product.metafields.theme.label.value
  elsif product_tags contains '_label_'
    for tag in product.tags
      if tag contains '_label_'
        assign tag_starts_with = tag | slice: 0
        if tag_starts_with == '_'
          assign has_custom_label = true
          assign custom_label = tag | replace: '_label_', ''
          assign custom_labels = custom_labels | append: custom_label | append: ','
        endif
      endif
    endfor
  endif
-%}
{% unless product.tags contains '非表示' %} <!-- ここに追加 -->
<div class="grid-item grid-product {{ classes }}" data-product-handle="{{ product.handle }}" data-product-id="{{ product.id }}">
  <div class="grid-item__content">
  {%- unless no_actions -%}
・
・
・省略
・
・
          {%- endif -%}
        </div>
      </div>
    </a>
  </div>
</div>
  {% endunless %}<!-- ここに追加 -->
ここの例で26行目とファイルの一番最後に同じコードを差し込めばOKです。
まとめ
shopifyは各テーマによって、大きく構造が違っていたりするので中々ファイルを見つけるのが大変ですが、辛抱強く「これかな?」ってところにコードを追加してプレビューしてみてください。
心配な方はローカル環境でテストするとベターかもしれませんね。
弊社ではshopifyのカスタムも行なっていますので、自分ではできない方はお問い合せからどうぞ!
